

DIY Gutter Installation (Video)
Hey guys, my name’s Aaron Massey from mrfixitdiy.com, and welcome back to another episode of homeschool’d. It’s been an extremely wet winter here in Southern California, and while that’s great for a state that’s been battling a severe drought for a number of years, it’s not so great for a house without gutters.
What Is The Function Of The Gutters?
So today, I’m gonna show you how to install gutters on your house. Gutters are an extremely important part of your house because they collect and divert rainwater away from your foundation. Without gutters, the rainwater falls directly down along your foundation walls and can cause problems over time. Eroding some of the soil, or undermining the foundation entirely, which can lead to failure. And if that happens, your talking tens of thousands of dollars to repair. It can also lead to flooding of your basement, or your crawlspace if you have one, so adding gutters to your house is a relatively inexpensive way to protect your investment.
I rate these projects by how many f-bombs you’re likely to drop while tackling the project. This one is not to f(drilling) difficult, but it does require a few tools you may need to buy or borrow from a friend or family member to help knock it out. Step one is to measure the sections of roof you need to install your gutters on and determine a rough layout. Now if you were to have your gutters installed professionally, you would probably get a seamless gutter. What that means is, one solid piece of gutter per section, and the reason why that’s beneficial is that it’s one solid piece. And so there are not really weak points where water can drip and leak and stuff like that.
Types Of Gutters, Aluminum And Vinyl
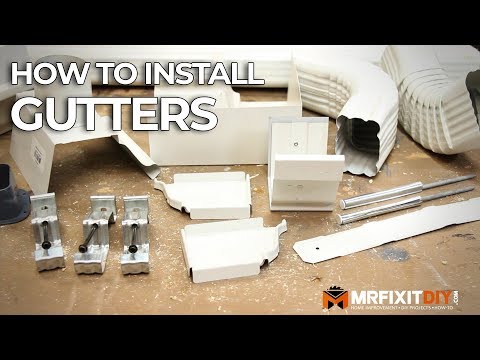
The big box stores typically sell gutters in aluminum and vinyl, and several different colors, but only in 10 foot length. So you’re either gonna be stuck with prefab sections of 10 foot lengths, and put your whole thing together, or you’re gonna have to get your gutters made. But at that point, you might as well pay to have somebody do it for you. Depending on your rough layout, you’ll likely need to buy a combination of a bunch of different pieces including: endcaps, inside and outside corners, downspout connections, 45 degree elbows, strapping, slip joints, and downspout and gutter sections.
Buy Some More To Have A Reserve
I recommend just buying more than you need of each thing, and then returning any unused pieces when you’re done. It makes things a lot easier, and you don’t have to go through and count each piece. When laying out your gutters, plan to install a downspout around every 30 feet. You can always check local codes as well to make sure that you have adequate spacing.
Gutter Assembly
Next, start to assemble your gutter based on the measurements you took previously. In this case, this section of gutter is just shy of 28 feet, so I’ll make it outta three pieces. At each joint, you’ll need to connect the two pieces of gutter. Now, you can use these slip joint connectors, where one piece of gutter slides into each end, but I find it really difficult to make them watertight. Even after adding a bunch of sealant in here, and I also find that they become a really weak point of the gutter because they don’t overlap.
What I choose to do instead is to actually just cut back a few inches on the front lip of the gutter, and then slide the other piece inside, in the direction that I need the water to shed. So the piece that you cut, is always the outside of the two pieces you’re joining together. To secure them together, make sure to put a nice thick bead of sealant.
I’m using this DAP clear sealant, which is specifically made for this application, but you can also use silicone if you choose to. And then you can use multiple ways to fasten them together. If you have a rivet gun, this is the perfect time to use it. Predrill a hole, and then place the rivets in. And then tighten ’em and snap ’em on. If you don’t have a rivet gun, you can also buy gutter screws to secure the pieces together. I find two screws or rivets on each side, on the top of the gutter, work well for holding everything together.
I find it gives the gutter a lot more strength this way, and because it overlaps, you have a watertight seal. To cut the gutter to length, I use a speed square to mark out my cut line. And then I like to use a thin, metal, cut off wheel on my angle grinder to make a nice, clean cut. I find this is way easier than using metal snips or a hacksaw, and it gives me a cleaner cut. At the ends of the gutters, you’ll need to install your gutter caps.
They come in left and right ends, and to install them you just add a nice bead of sealant on them, and then slide them on the end. Now, I’m using a crimping tool to hold these caps in place. This tool puts a little divot on one side of the metal and presses it into the other piece to create a really tight hold. Now if you don’t have one of these, which I’m assuming many of you don’t, you can just predrill and use the same gutter screws or rivets to hold it in place.
The Downspouts
Finally to install the downspout connections, you have a few options. They sell these prefab downspout pieces you can use. To attach them, you flip the piece upside down to lock the metal lips together, and then spin it down into place. The same thing applies to attaching it as the other pieces. Make sure you add a lot of sealant, and then use screws or rivets to hold it in place.
Another option for downspouts, and the option that I prefer, are these downspout inserts. These can be placed anywhere along the gutter length. And to install them, just trace them out, and then cut the piece out. I prefer to start with a hole saw, and then snip out the rest to get a nice fit. Add some sealant all the way around it before installing this in place as well.
Gutter Hangers Installation
Now that the gutter is complete, I like to loosely space out the hangers for the gutter. These hangers slip under the front lip and then slide over the back of the gutter, so trying to get them to go under the front lip once on the house can be very difficult with the roof and the drip edge in the way. So I like to do it on the ground, before I actually lift the gutter in place. The other thing to consider, is you don’t wanna hang the gutter to high. I like to use a level on the roof to extend the roof edge out.
The front of the gutter on the high side should start just below that level, and slope towards the downspout from there. One thing you can do to help you install your gutter is to set a nail and then use a string level and a chalk line to make sure that you have a nice clean line to follow, so when you go to install the gutter you can just follow that line. Or you can also start at one end, and use a four foot level as you go to make sure that you keep the slope that you need.
You want your gutter to shed in the direction of your downspout, and the rule of thumb is to have it drop about a half inch for every 10 feet of gutter length. The idea is that you just need to maintain an adequate slope so that the watersheds towards your downspout. To secure the gutter to the fascia, I slide the gutter hangers in place to line up with the rafter tails of the house and then screw them down. I always like to test the function of the gutter system with a hose to make sure everything is watertight, and there are no leaks before wrapping it up.
Downspout Installation
Lastly, it’s time to install the downspout. Typically, you’ll use a combination of elbows to bring the downspout back towards the exterior wall of the house, and then secure a length of downspout down the side of the house with some strapping. At this point, you could also add a rain barrel collection system, if you choose to, which I’ve added in some areas of the house. Or you can just make sure that the watersheds down away from your foundation. And that is it. You are done with this project. That’s it for this episode of homescool’d. I hope you guys enjoyed it, and I hope you learned something. Installing gutters can take a little bit of time, but once you get the hang of it, it’s a project you can relatively easily tackle on your own and hopefully save yourself some money.
If you guys did like this episode, please hit that like button, and leave a comment down below. And let me know. Also, if you wanna check out more of my home improvement or DIY project videos, I’ll post links to those right here. Or you can always follow all of my content on my website at mrfixitdiy.com. Thank you guys so much for watching. I’ll see ya next time.